ഗ്യാസ് സിലിണ്ടർ മാറ്റിസ്ഥാപിക്കാൻ ഇപ്പോഴും പേടിയാണോ.!? എങ്കിൽ ഇതൊന്നു കണ്ടു നോക്കൂ, ഇനി ഒട്ടും പേടിയില്ലാതെ എളുപ്പം മാറ്റി ഫിറ്റ് ചെയ്യാം | Gas Cylinder Replacing Easy Trick
Gas Cylinder Replacing Easy Trick : അടുക്കളയിൽ പാചകം ചെയ്യാനായി അടുപ്പുകൾ ആശ്രയിക്കുന്ന കാലമൊക്കെ കടന്നു പോയി. ചുരുക്കം ചിലർ മാത്രാമാണ് ഇന്ന് അടുപ്പുകൾ ഉപയോഗിക്കുന്നത്. ബാക്കി വരുന്ന വലിയൊരു ഭാഗം ആളുകളും വീട്ടിലെ മുഴുവൻ പാചക ജോലികളും ചെയ്തു തീർക്കുന്നത് ഗ്യാസ് അടുപ്പുകളുടെ സഹായത്തോടെയാണ്.
ഗ്യാസ് സ്റ്റവുകളും സിലിണ്ടറുകളും ഇല്ലാത്ത വീടുകൾ ഇല്ലെന്നു തന്നെ പറയാം. ഭൂരിഭാഗം പേരും ഉപയോഗിക്കുന്നുമുണ്ട്. എന്നാൽ പാചകം ചെയ്യുന്ന എത്ര പേർക്ക് സ്വയം ഗ്യാസ് സിലിണ്ടർ മാറ്റി സ്ഥാപിക്കാൻ അറിയാം.? നിസ്സാരമെന്ന് തോന്നുമെങ്കിലും വ്യക്തമായ അറിവില്ലാത്തതാണ് കാരണം. പെട്ടെന്ന് ഗ്യാസ് തീർന്നുപോയാൽ മറ്റുളവരെ ആശ്രയിക്കുന്നവരാണ് നമ്മളിൽ കൂടുതൽ പേരും.
അപകടമില്ലാത്ത ശ്രദ്ധയോടെ ഇതും നമുക്ക് എളുപ്പം ചെയ്യാം. എങ്ങനെയാണ് ഗ്യാസ് സിലിണ്ടർ മാറ്റി സ്ഥാപിക്കുന്നത് എന്നാണ് ഈ വീഡിയോയിൽ പരിചയപ്പെടുത്തുന്നത്. ഇനി പേടികൂടാതെ സ്വന്തമായി തന്നെ സിലിണ്ടർ മാറ്റി ഫിറ്റ് ചെയ്യാം.അറിവ് ഉപകരപ്രദമെന്ന് തോന്നിയാൽ മറ്റുള്ളവരിലേക്ക് കൂടി എത്തിക്കാൻ മറക്കല്ലേ.
വീഡിയോ നിങ്ങൾക്ക് ഇഷ്ടമായാൽ ലൈക് ചെയ്യാനും ഷെയർ ചെയ്യാനും മറക്കരുത്. കൂടുതല് വീഡിയോകള്ക്കായി MasterPiece ചാനല് Subscribe ചെയ്യാനും ബെൽ ഐക്കൺ ക്ലിക്ക് ചെയ്തു നോട്ടിഫിക്കേഷൻ ഇനേബിൾ ചെയ്യാനും മറക്കരുത്. Gas Cylinder Replacing Easy Trick Credit : MasterPiece
Gas Cylinder Replacing Easy Trick
Replacing a gas cylinder at home is simple and safe if done properly. Here’s a clear step-by-step guide you can follow, especially for LPG cylinders (like Indane, BharatGas, HP) commonly used in kitchens:
- Step 1: Turn Off the Stove
Ensure all burner knobs are in the OFF position before replacing the cylinder. - Step 2: Close the Empty Cylinder Valve
Turn the valve knob on the top of the cylinder clockwise to shut off the gas supply completely. - Step 3: Detach the Regulator
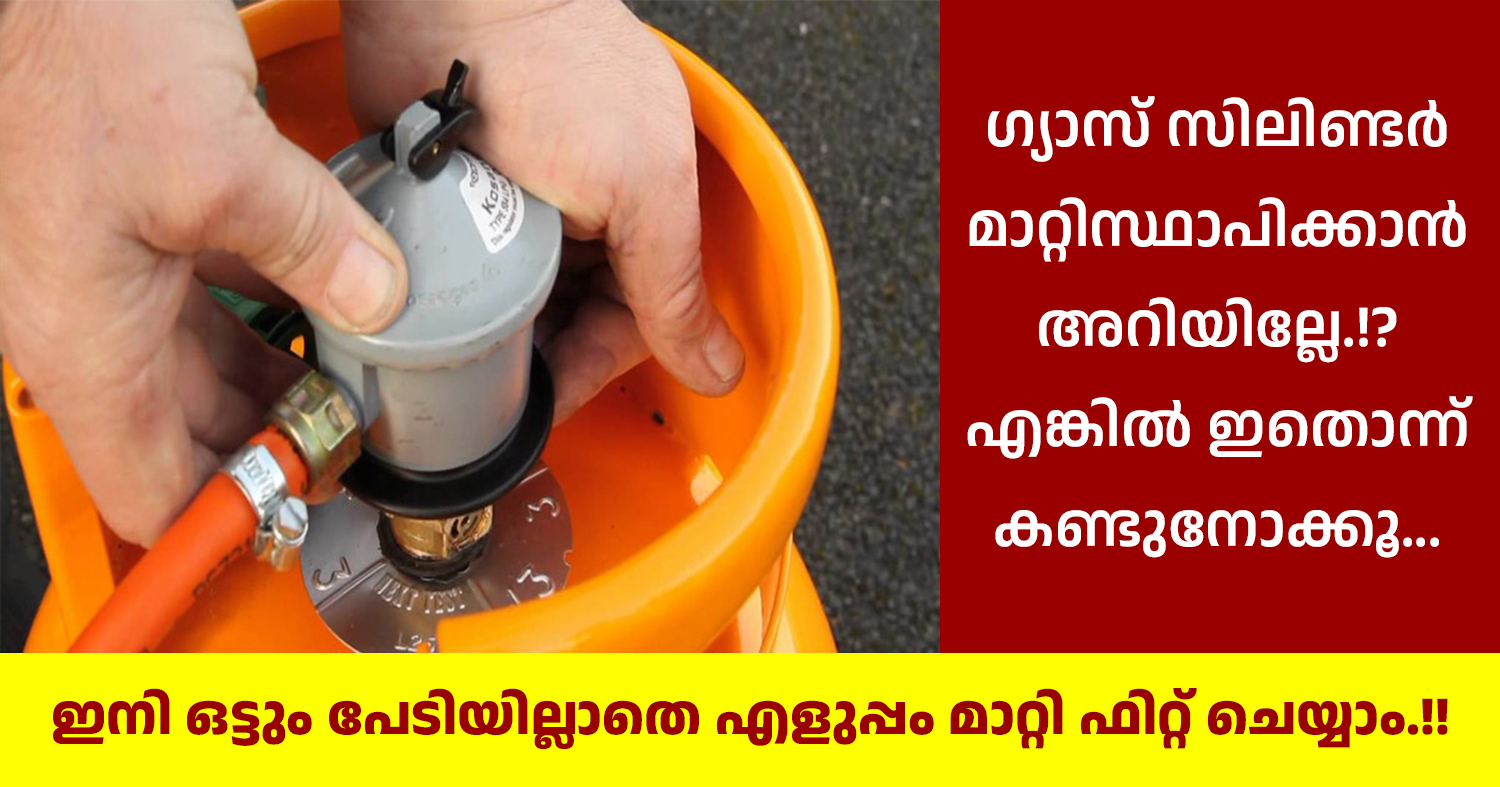
Grip the regulator (pressure knob) connected to the top of the cylinder.
Lift the locking pin or press the switch (depends on the type) and gently pull the regulator upward to disconnect. - Step 4: Remove the Empty Cylinder
Carefully take the empty cylinder aside. - Step 5: Position the New Cylinder
Place the new cylinder upright and stable near your gas stove.
Check for any damage, expiry date, or leakage (smell) before connecting. - Step 6: Connect the Regulator
Align the regulator nozzle with the cylinder valve.
Push down the regulator vertically on the valve until it clicks or locks in place.
Don’t twist or force it. - Step 7: Open the Valve
Turn the cylinder valve anticlockwise to open the gas supply. - Step 8: Test for Leaks (Safety Check)
Apply soapy water around the valve and regulator joint (never use a matchstick).
If you see bubbles, there may be a leak – close the valve immediately and contact your gas agency.